How to Grill a Steak
After writing about how to cook a steak last month, I received a lot of questions about the technique. The main question that came up was what to do if you want to grill a steak, rather than cook one in a pan on the stove. It is getting warmer and there is something special about grilling outdoors with a few friends and some cold beers. So, I have decided to dive into the topic of grilling, something I admitedly don’t do too often. Nevertheless, I arranged for a barbecue get together at a friend’s flat that has a great outdoor space for grilling and set about to grill the perfect steak.
Like any good steak, it all begins with the quality of the meat.
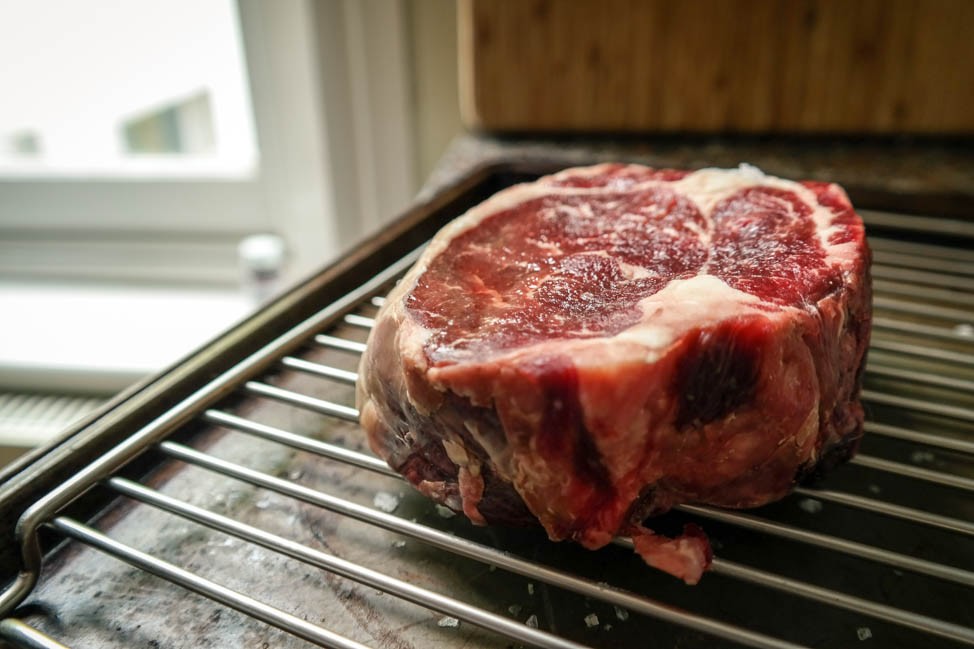
Much like the pan searing technique, this method only works with thick steaks. I decided to try some dry-aged steaks from Ginger Pig, the best known butcher in London, with a few locations scattered around town. Since we have the fantastic Turner and George a short walk away, I don’t often head down to Ginger Pig, but I found myself near their Marylebone location and picked up a few steaks.

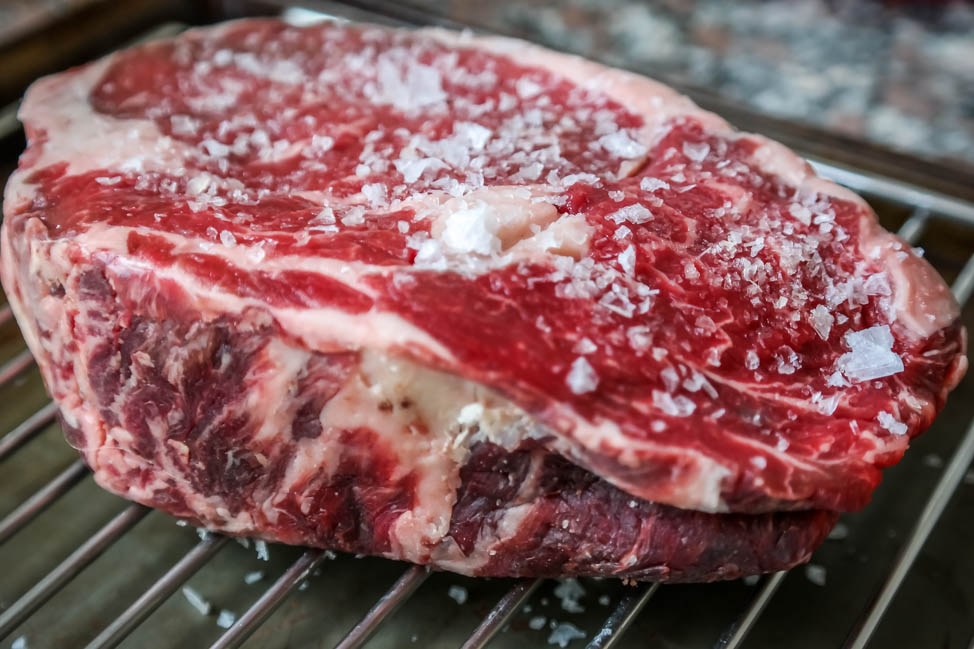
I chose two of these large hunks of meat. Fifty day, dry aged ribeyes, each weighing a little over 500 grams (about 18oz). Super thick and a nice amount of lovely fat running through the meat. For me, eating a steak like this is an indulgence, so do not be afraid of fat. Filet steaks are fine, but they are incredibly expensive and don’t pack much in the flavor department. I always get the best results with a big, fatty, juicy steak.
You can always eat a salad tomorrow.
The biggest difference to this technique versus my previous one is the preparation method. My friend Pat commented that he likes to pre-salt steak, heavily coating the meat in salt before brushing off the excess prior to cooking.
Pre-salting draws out moisture in the meat, and pools of water form on top of the steaks within about 15 minutes. After about 45 minutes, the liquid disappears. This is basically a form of brining, like lots of people do with turkeys and chickens. The salt mixes with the moisture that is extracted, dissolves and then the briny mixture is reabsorbed by the steaks. This means that the steak is fully seasoned from the inside out. There is no need for additional salt when you go to the grill. They are already perfectly seasoned.
And the longer you let the salt soak in, the more effective the seasoning becomes.
Based on my experimentation, I’ve found that a full day of salt-bath is perfect. I aggressively salted the steaks like I normally would to the point where the salt is visible, but then left them on a rack, uncovered, in the fridge for over 24 hours. Now, you can let the meat rest for up to four days, but in my fear that the steak would get too salty, I stuck with just one day. At the bare minimum, wait until he salt is dissolved and the liquid reabsorbed, so 45 minutes. Trying to grill steak that is covered in moisture will not yield great results. And please, use good quality salt, like sea or kosher salt. This is not the time for basic table salt, which can have a chemically aftertaste.
About an hour before cooking, take the steaks out of the fridge and allow them to come up to room temperature, while attending to the grill. While a gas grill heats up quickly and does not require too much preparation, a charcoal grill requires a little more time and energy. For this technique, it’s best to build up the charcoal on only one side of the grill and get it going at least 30 minutes before cooking. For a multi-burner gas grill, just put one side on low and one side on high.
While big flames are fun to look at, the flame-less white hot charcoal is what you need to cook a steak properly.
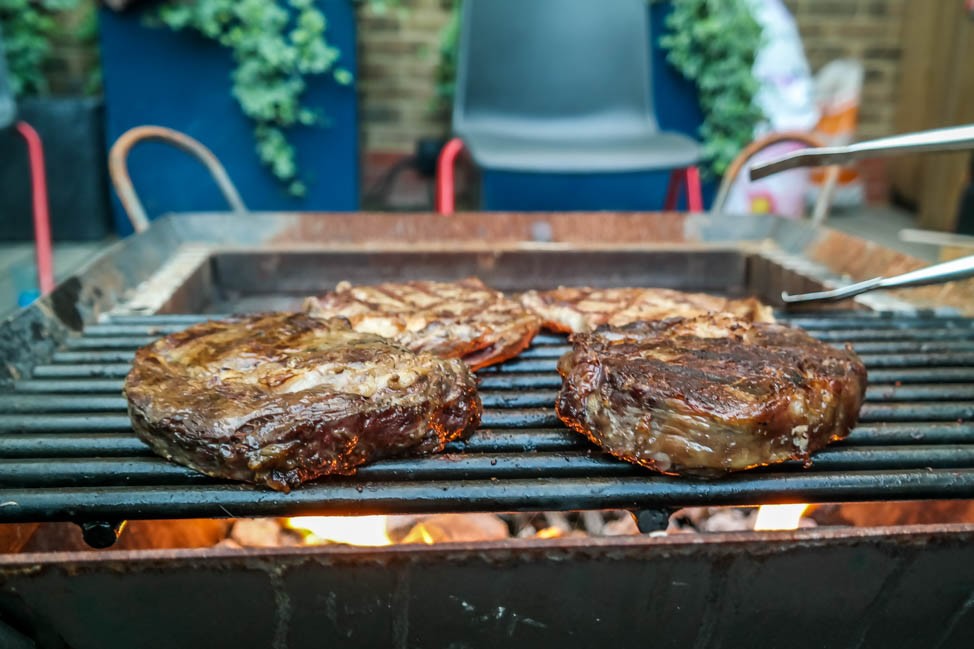
Now, the technique for cooking a steak on the grill versus on the stove is the same. Lots of flipping. Every minute or so. The key difference for grilling is not cooking directly over the high heat. You want indirect heat, which is why you need to build the fire on one side of the grill, so there is a high heat side and a low heat side. Cook over the cooler side. Again, I know it sounds crazy and counterintuitive, but trust me on this one.
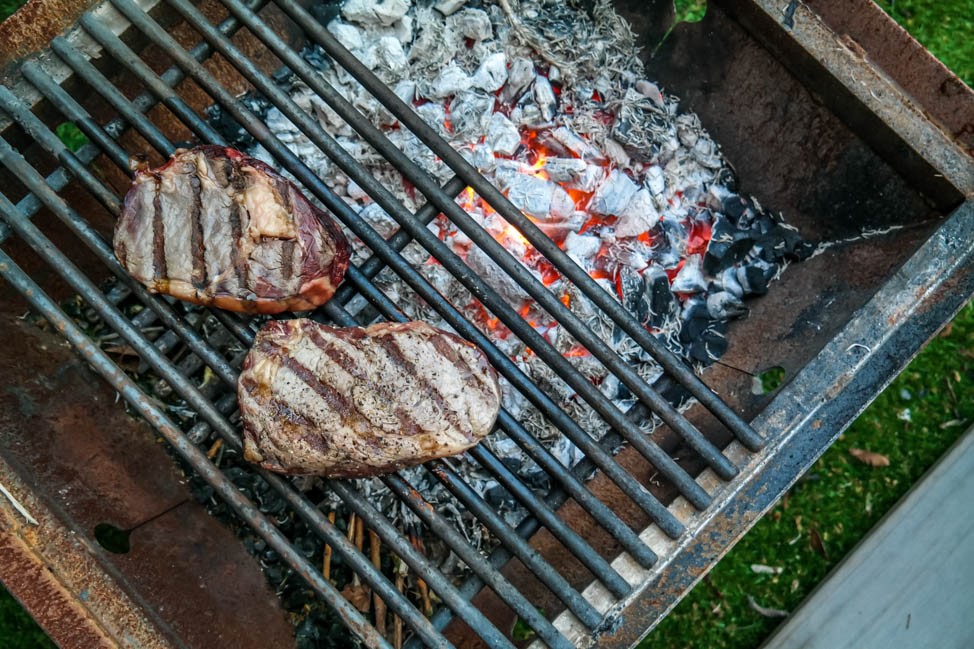
The steaks don’t look particularly pretty after a few flips (photo above), and you will probably get some looks from your grilling friends. But be patient. At this stage, the concern is getting the interior temperature right, not worrying about a perfectly charred exterior. For my 500g steaks, it took about 12-15 minutes of flipping for the steaks to reach medium rare.
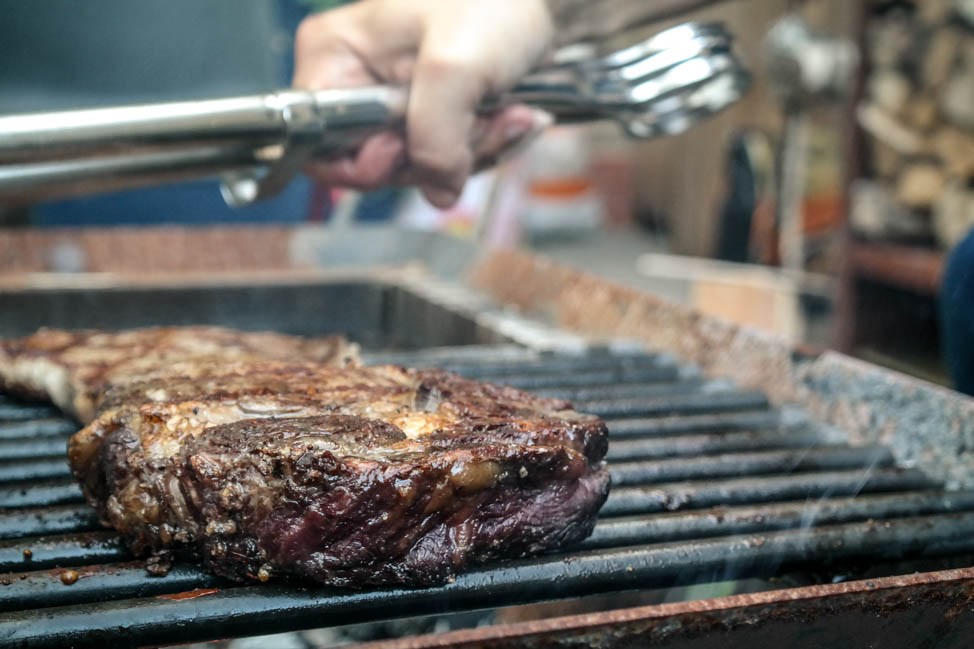
At this point, it is time for the final flourish.
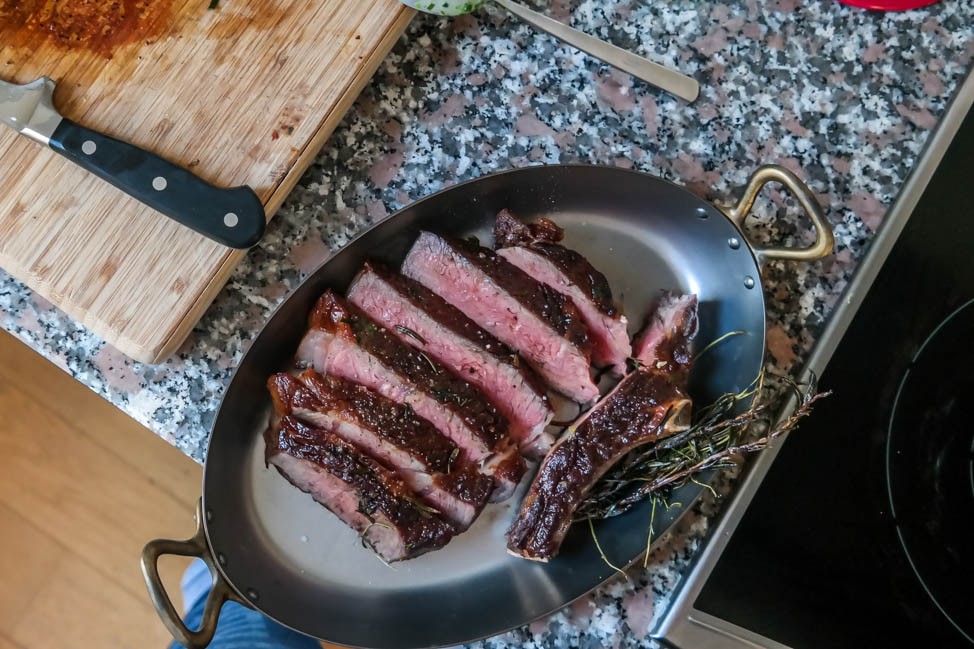
Move the steaks to the hot side of the grill, directly above the white hot charcoal. After only about a minute on each side, you will get that great color and crust on the steak, all while maintaing the integrity of the interior. Medium rare in the middle, charred and delicious on the outside. A winning combination. Now, doesn’t this steak look nice?
Of course, never forget to rest your meat. At least 20 minutes. I understand the desire to start eating right away and the temptation is hard to resist, but the final product will be so much better if you let the steaks rest. Cover them lightly in a tea towel or some tin foil.
Bring some chips and dip to help fight the urge to eat straight away. I made some of my killer guacamole to avoid any premature slicing.
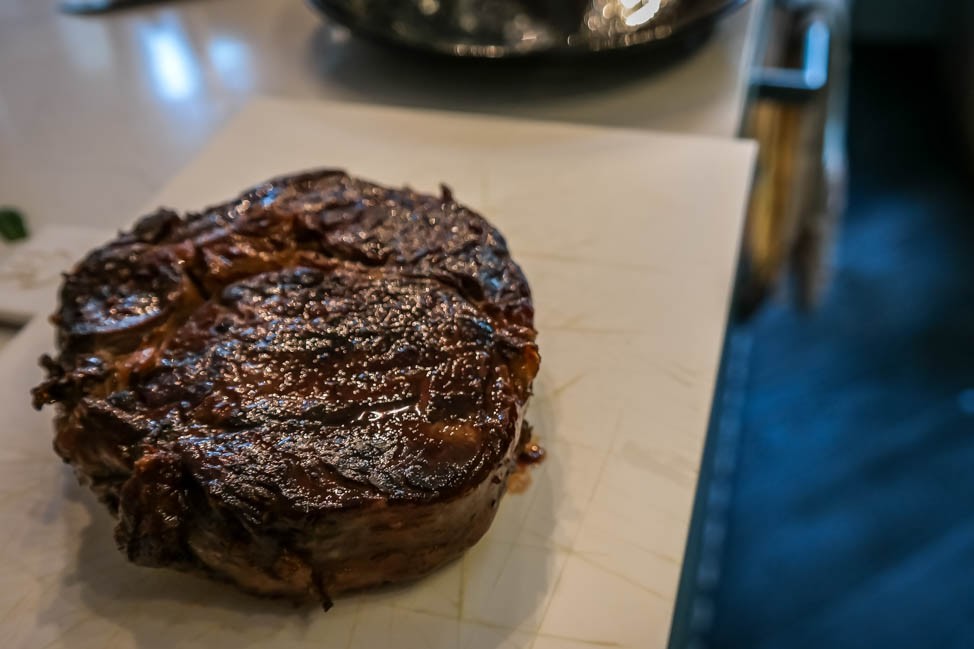
After resting, slice and serve. There is nothing more beautiful in my mind that a perfectly cooked steak. While I love cooking steaks on my stove, there is something festive about taking the show outside, whether it be in a friend’s backyard or on a beach.
With this technique, you will win at summer barbecues every time. Enjoy!